Saturday, July 28, 2012

Connecting the Wires

Another Saturday is upon us and I had a project that needed to get done.  Our new home has network cables in the walls and many rooms have a network jack ready to go.  The problem with all that is those cables didn't actually connect to anything!  In our laundry room we have a box that has all of our network/phone/cable/satellite cables, a lot I know.  So today was the day to change all that.  My dad graciously came over to help me out as he has a lot of experience having wired their home.

The box that was installed doesn't have electricity and if we were going to connect the network together it needed a switch which needed to be powered.  After a quick trip to Home Depot, we had the necessary electrical wires, box, outlet, and screws to get everything in place.  The box was removed to and we drilled a hole through a stud and tapped into the breaker box to give us power to the electrical outlet.  It was nice because we didn't need to remove any drywall which was something we had been dreading.  I don't have an original photo with the wires in the box but it was a mess.  Essentially all the wires you see in the picture below were just all smashed in the box.  We cleaned it up a lot.

With the outlet in place all that was left was to put the connector ends on the cables and plug in the switch.  The trick with Cat5 Ethernet cables is that there are two types, a normal Ethernet cable and a crossover cable.  In a crossover cable the wires at the end are wired differently and we needed them to match to get a normal Ethernet cable.  I unscrewed the plate under my computer and looked at how it was wired.  We decided it was a type B cable and so we wired accordingly which is White-Orange/Orange/White-Green/Blue/White-Blue/Green/White-Brown/Brown, just in case you wanted to know.


Every cable needed to be wired as such and with that done we simply needed to plug it all in and clean up.  Testing all the ports showed that we did it right and firing up the Xbox gave me an open NAT.  I am very pleased.  I've had a Moderate NAT forever since I was sharing Internet from my laptop to the Xbox but now it has a direct connection!  Awesome.  This house just gets better and better.  Thanks to my dad who, once again, had all the tools and know-how to get the job done quickly and right.


First make it possible.  Then make it beautiful.  Then make it fast.

Eric

Friday, July 13, 2012

Pinterest Project Party

Let me begin by offering my apologies.  This post is about 3 months overdue and is the story of 4 friends that got together one day in April to be crafty and creative together.  As I have mentioned in previous posts I follow the wonderful John & Sherry of Young House Love.  Once a quarter Sherry and her friend Katie have a pinterest challenge where they stop pinning and start doing!  I wanted to do the same thing with my friends so I invited Heather, Amy Jo, and Ashlee over and we all went to work.

We brought out the cutting boards...

And the ironing board...

And the glitter...

And our sewing machines.

I think we ended up with some pretty great projects.  Ashlee worked on a plaque for her mother.  She used acrylic paints and Heather's cricuit to cut out the vinyl.  She also fancied up an old pair of black heels with glitter.  They looked so cute!  Like a brand new pair of pumps.

 My project was a cafe curtain for our kitchen window.  I picked a bright yellow fabric to bring some color into what is otherwise a pretty neutral room.  I used a spring curtain rod and clips so I didn't have to sew any tabs or pockets.  The sewing itself went pretty quickly but I did have to make a second trip back to Joanns to get more clips.

I like how it still lets in a lot of light but allows for enough privacy when needed.

This beautiful blanket was Amy Jo's project.  She made it for a friend or a cousin (I can't remember) who was having a little baby girl.  She made the entire thing in the one day we were working on things.  I wish I could sew that quickly and still have something turn out so nice.

Everyone raved over Amy Jo's blanket and she's already been commissioned to make blankets for all of us when we have our own little babies!  Our friend Kaley has even picked out her colors already...gray and pink.

Heather had the great idea to make a throw pillow from a famous Audrey Hepburn quote - "Paris is always a good idea".  I really like how it turned out.  Simple but still more interesting than a normal pillow.   


We ended up with some really great things and I know that I had a great time with the girls.  I actually think I'm about ready for another one!  There are plenty of projects that I need to work on.  I guess I'm going to have to gather up the crafting troops again!

So is anyone else completely addicted to pinning but lacking in the motivation to actually start doing?  Any fun pinterest-inspired projects out there?

xo,
Carly

Sunday, July 8, 2012

One Small Step? One Giant Leap!

We did it.  We finally did it!  After three months living in our new home we finally took the plunge, we hung a picture on our wall.  I know, I know, how could we put a hole in our nice beautiful new walls?  That's what we thought too but it's about time we made this house feel like a home and add our own touch.  If you have ever visited our house up to this point you'll know the walls are bare and the main floor has canvases and picture frames lining the walls.  It was time to hang at least one up!  We started with something simple, our vintage Harry Potter travel poster gifted to us last Christmas by Carly's mother.  We absolutely loved it but never got around to getting a frame or hanging it so we thought it fitting that it should be our very first to be hung.  The spot we chose was the loft area.  We want to make that area very 'us' with things that we both enjoy and Harry Potter memorabilia fits right in.  After a quick trip to Michael's to buy a frame we set about the measuring and hanging.
We wanted it to hang so the words were just above eye level.  It turned out really good.  I'm not really sure what else to say, we just hung a picture frame but to us it was a huge deal, even Daisy wanted to help hang it!  We are making a new-found effort to make our house more like a home and hope to continue doing things like this all over until we can get it to really feel like our own.  Enjoy the pictures!
First make it possible.  Then make it beautiful.  Then make it fast.

Eric


Saturday, July 7, 2012

Sleepy time for Daisy!


So I was trolling around Pinterest and I came across this fabulous dog bed.
My dog needs a bed like this.  To go with his 3 other beds.
and I just had to have it for little Daisy.  Eric and I have been looking for a cute bed to buy for her.  She needs to have her own place in our living room to go to when people come over or we are busy.  It took us a while to find a suitcase that we could use for this fun project but finally we came across one at DI for $3.  Eric went with me to Brooks Fabrics here in Bountiful and we picked out some great on sale fabric.  Some feet, tape, and a can of spray paint later we were ready to go. 


Luckily the weather was fantastic and as soon as we got home with our treasures we cleaned the thrift store suitcase and I sent Eric outside with the spray paint.


It took about 3 coats until we ended up with this...


Then Eric took it inside and McGyvered some feet onto the bottom for me.  I'm not sure what the wooden balls that we used are actually for but there were 4 of them in the pack and we needed something relatively short.  Daisy has little legs.   Personally, I think they turned out pretty great.


While Eric focused on the suitcase I went to work on the cushion and blanket.  I used the pillow form out of an old throw pillow I had on our bed upstairs.  It fit perfectly.  I made an envelope pillow cover so that we can take it off and throw it in the washing machine when needed.  It was my first time making an envelope cover and I was super nervous but it's not too difficult.  

And hey, the pillow even fit when I finished sewing!  Bonus!


As an extra side project for me I decided to use the rest of pillow fabric to make a small quilt for Daisy.  I've been wanting to try a pinwheel quilt for a while but making a full-sized one was just too intimidating.  But making a mini 27" x 23" quilt for Daisy seemed do-able.  Here are some of my tiny squares that I started out with.  


The sewing of the pinwheels actually went pretty smoothly once I got going.  I scared myself in the middle because none of my triangles seemed to be lining up correctly but once I made one full square it all worked out.


I didn't take pictures of the final few steps on the mini-quilt because I was getting pretty frustrated with it all.  I put a thin layer of batting in the middle and followed with a solid back in the reddish color.  I finished by trying to do a double-fold edge, which was pretty much the worst thing I've ever done on a sewing machine. I didn't take any close-up pictures because it was so bad.  Uneven and crooked.  I never understood why everyone complained so much about making a bias tape until I tried doing one myself.  Hopefully I'll never have to make one again.

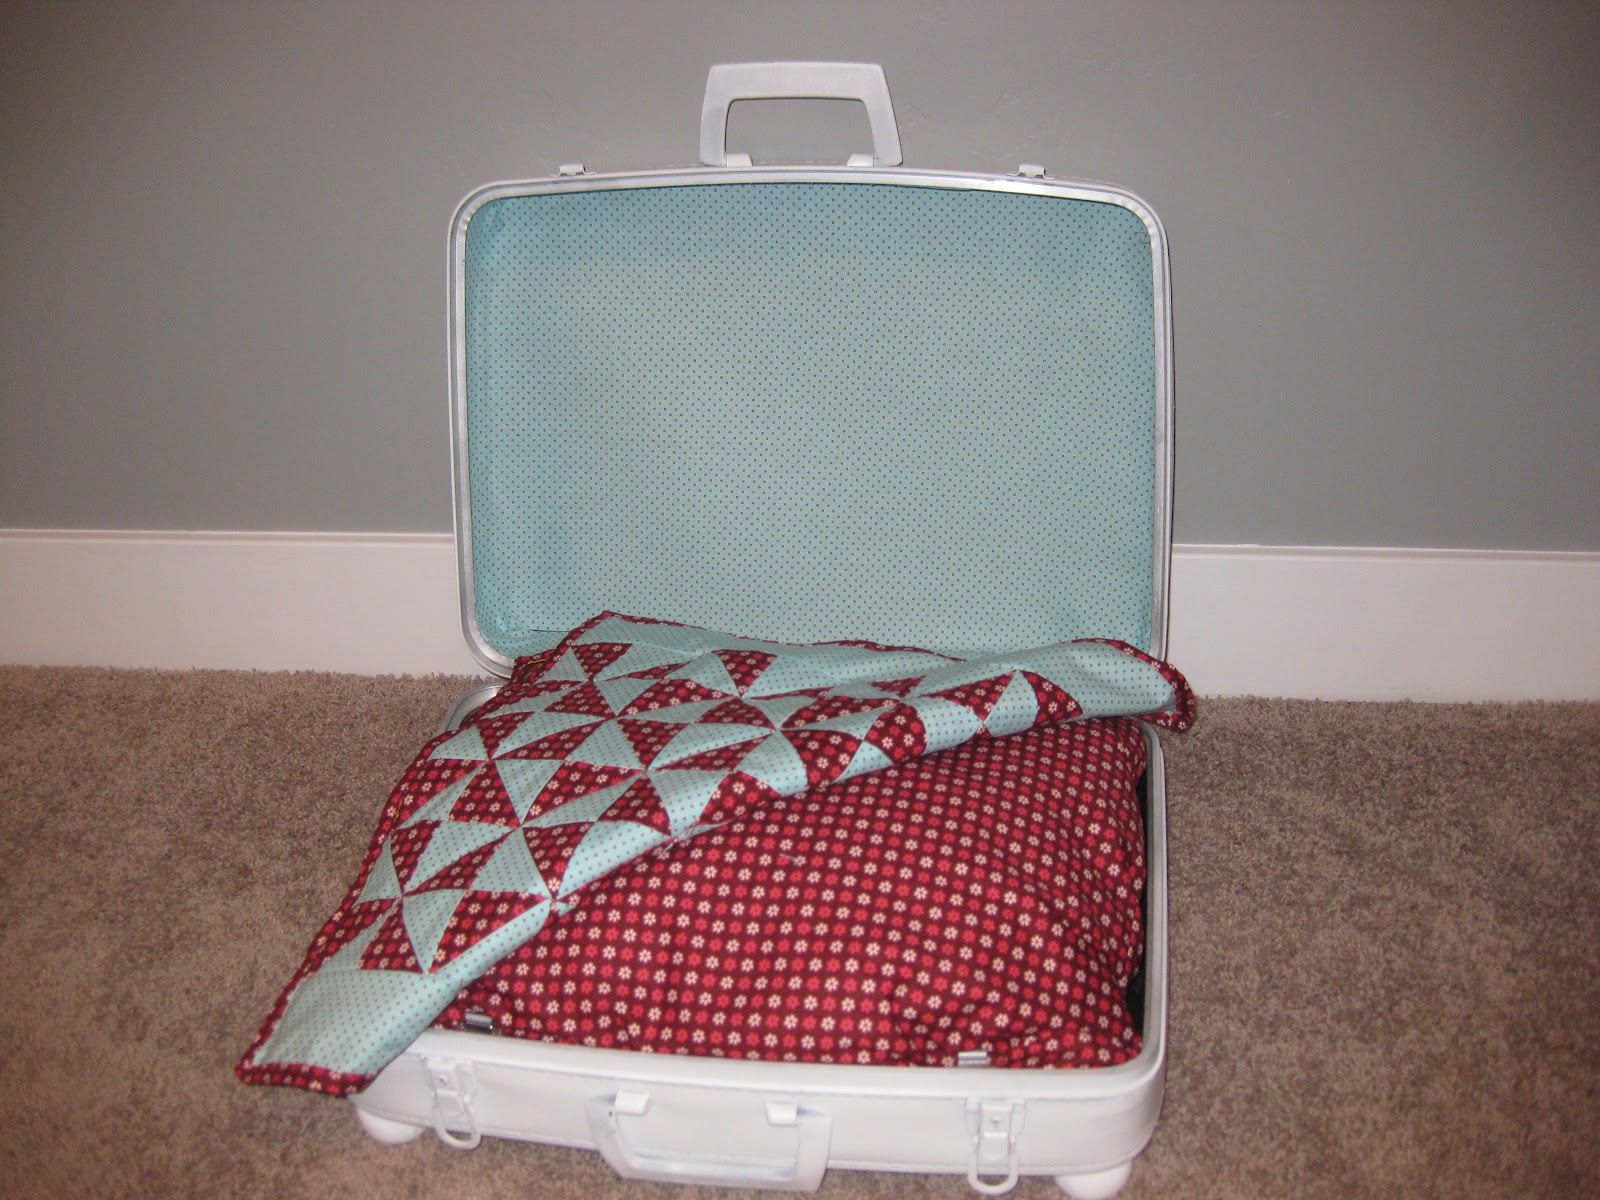
After the quilt Eric completed the final step of the project.  We lined the ugly, black fabric inside with our remaining pretty blue fabric.  This was probably his least favorite step.  He wanted to make sure it looked really good since it will be in our main living area.  Combining nervous, sweaty hands with lots of spray glue didn't make the best combination but he did a great job.


So without further ado...Daisy's finished bed!!  We looove it.


And Daisy thinks it's pretty cool too.  We snapped a few photos of her while she was testing it out.


If she can get the quilt the right angle she likes to burrow up underneath it and fall asleep.


She mostly uses her bed during the evenings when Eric and I are up and moving around the house cleaning or making dinner.  I think she really likes having her own safe place to go where no one will bother her.  Our next goal is to train her to go to her bed whenever someone knocks on the door.   Having a little yappy dog at the door each time someone comes is starting to get a little tiring.  We'll let you know how the training goes.

So, what do you think of our bed?  Pretty cute, huh?  Anyone else out there spend entirely too much of their weekend making a bed/quilt for a 3 lb dog or any great dog-training tips to share?

xo,

Carly